Online помощник Cети плюс
Содержание:
- Настройка VLAN в маршрутизаторе Zyxel Keenetic
- Использование межсетевого экрана в маршрутизаторе Zyxel Keenetic
- More technical Lets look at microfilters
- Setting Up Wireless Broadband Connection
- Настройка маршрутизатора ZyXEL Keenetic
- Характеристики роутера ZyXEL Keenetic
- Internet problems troubleshooting steps
Настройка VLAN в маршрутизаторе Zyxel Keenetic
В маршрутизаторе Keenetic (с микропрограммой V2) на одном физическом LAN-порту можно настроить два разных VLAN, например, чтобы один VLAN имел полный доступ к ресурсам локальной сети и к Интернету, а другой VLAN (гостевой) имел бы доступ только в Интернет.
Для реализации данной задачи в маршрутизаторе Keenetic (с микропрограммой V2) требуется создать два VLAN, например:
VLAN 3 – для доступа к локальным ресурсам и Интернету,VLAN 4 – для гостевого доступа.
Примечание: VLAN 2 является служебным. По умолчанию он используется для порта 5 (WAN).
Для каждой VLAN требуется настроить свой DHCP Pool (диапазон IP-адресов, назначаемых по DHCP).
Ограничить доступ к локальным ресурсам и управлению маршрутизатором можно с помощью встроенного межсетевого экрана (Firewall).
Настройку VLAN произведем, например, на 4-м физическом LAN-порту встроенного Ethernet-коммутатора Keenetic’а. Настройки LAN-портов 1-3 и беспроводной сети Wi-Fi в процессе создания VLAN не затрагиваются.
Настройку маршрутизатора удобнее выполнять из режима командной строки (CLI) устройства.
1. Подключитесь к интернет-центру через telnet-подключение, используя его IP-адрес и пароль по умолчанию (если не меняли).
|
telnet 192.168.1.1
Password: 1234 |
2. Создайте VLAN 3, VLAN 4 и привяжите их к LAN-порту 4 интернет-центра.
| (config)> interface Switch0 (config-if)> port 4 (config-if-port)> mode trunk Trunk mode enabled (config-if-port)> trunk vlan 3 Vlan added to trunk (config-if-port)> trunk vlan 4 (config-if-port)> exit |
3. Установите IP-адрес для интерфейсов Switch0/VLAN3, Switch0/VLAN4 и активируйте созданные интерфейсы. В нашем примере для локальной сети назначаем подсеть 192.168.3.0/24, для гостевой – 192.168.4.0/24.
| (config)> interface Switch0/VLAN3 (config-if)> ip address 192.168.3.1/24 Network address saved. (config-if)> security-level private Interface set as private(config-if)> up Interface enabled. (config-if)> exit (config)> interface Switch0/VLAN4 (config-if)> ip address 192.168.4.1/24 (config-if)> up (config-if)> exit |
4. Создайте DHCP Pool для VLAN 3 (192.168.3.33 — 192.168.3.43) и VLAN 4 (192.168.4.33 — 192.168.4.43).
| (config)> ip dhcp pool HOME3 pool «_HOME2″ has been created. (config-dhcp)> range 192.168.3.33 192.168.3.43 pool «_HOME3″ range has been saved. (config-dhcp)> bind Switch0/VLAN3 pool «_HOME3″ bound to interface Switch0/VLAN3. (config-dhcp)> exit(config)> ip dhcp pool HOME4 pool «_HOME4″ has been created. (config-dhcp)> range 192.168.4.33 192.168.4.43 pool «_HOME2″ range has been saved. (config-dhcp)> bind Switch0/VLAN4 |
5. Настройте межсетевой экран (Firewall) для блокировки доступа с VLAN 4 к управлению интернет-центром Keenetic и к ресурсам корпоративной сети.
| (config)>access-list _WEBADMIN_VLAN4
(config-acl)>deny tcp 0.0.0.0 0.0.0.0 192.168.3.0 255.255.255.0 ACL rule added. (config-acl)>deny udp 0.0.0.0 0.0.0.0 192.168.3.0 255.255.255.0 ACL rule added. (config-acl)>deny icmp 0.0.0.0 0.0.0.0 192.168.3.0 255.255.255.0 ACL rule added. (config-acl)>deny tcp 0.0.0.0 0.0.0.0 192.168.1.0 255.255.255.0 ACL rule added. (config-acl)>deny udp 0.0.0.0 0.0.0.0 192.168.1.0 255.255.255.0 ACL rule added. (config-acl)>deny icmp 0.0.0.0 0.0.0.0 192.168.1.0 255.255.255.0 ACL rule added. (config-acl)>deny tcp 0.0.0.0 0.0.0.0 192.168.4.1 255.255.255.255 ACL rule added. (config-acl)>deny udp 0.0.0.0 0.0.0.0 192.168.4.1 255.255.255.255 ACL rule added. (config-acl)>deny icmp 0.0.0.0 0.0.0.0 192.168.4.1 255.255.255.255 ACL rule added. (config-acl)>exit (config)>interface Switch0/VLAN4 (config-if)>ip access-group _WEBADMIN_VLAN4 in Access group applied (config-if)>exit |
6. Включите NAT (функция трансляции сетевых адресов) для интерфейсов Switch0/VLAN3 и Switch0/VLAN4.
| (config)>ip nat Switch0/VLAN3
NAT rule added. |
7. Сохраните конфигурацию.
| (config)>sys config-save
Saving configuration (config)>exit |
Использование межсетевого экрана в маршрутизаторе Zyxel Keenetic
Предположим, что существует задача организовать разные права доступа в Интернет через маршрутизатор Keenetic (с микропрограммой V2), например:
- Двум хостам предоставить доступ без ограничений;
- Одному хосту предоставить доступ только к удаленному серверу для подключения;
- Всем остальным хостам запретить выход в Интернет.
Эту задачу можно решить с помощью правил межсетевого экрана для локального интерфейса Home network. Настройка межсетевого экрана (Firewall) производится в меню Безопасность > Межсетевой экран.
Внимание! Логика работы межсетевого экрана такова, что правила выполняются по порядку сверху вниз.
Таким образом, для одних хостов выше в списке должны находиться разрешающие правила. Также рекомендуется в конце списка указывать более общие правила (т.е
работающие для наибольшего числа хостов).
В поле Правила для интерфейса укажите имя интерфейса домашней сети Home network (Wired and wireless hosts) и затем создайте правила межсетевого экрана. Нажмите кнопку Добавить правило для создания нового правила.
Должен получиться следующий порядок правил для интерфейса Home network:
1. Для хостов, у которых будет доступ без ограничений, например 192.168.1.33 и 192.168.1.34.
Для второго хоста (192.168.1.34) нужно настроить аналогичные правила. В итоге получим:
2. Для хоста, которому нужно предоставить доступ к одному ресурсу в Интернете (например, к сайту zyxel.ru, имеющему IP-адрес 95.211.169.65, адрес хоста 192.168.1.35).
3. Чтобы хост 192.168.1.35 мог обращаться к DNS-серверам, нужно будет разрешить данный трафик.
4. Для всех остальных хостов локальной сети нужно заблокировать доступ.
В итоге должен получиться следующий набор правил в указанном порядке:
После этого попробуем с разных хостов обратиться к внешним ресурсам.
С хоста, имеющего IP-адрес 192.168.1.33:
C хоста, имеющего IP-адрес 192.168.1.35:
С хоста, имеющего IP-адрес 192.168.1.36:
Редактирование правил межсетевого экрана через файл конфигурации устройства.
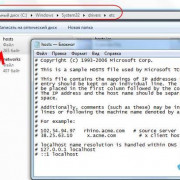
Удобнее работать с правилами межсетевого экрана (создавать подобные, менять местами, править и т.д.) через текстовый редактор, используя файл конфигурации устройства. Для этого в меню Настройка > Файлы выполните сохранение файла startup-config и затем откройте его в текстовом редакторе (например, Блокнот). Вы можете создавать/изменять/удалять любые правила, после чего нужно обязательно сохранить изменения в файле и загрузить затем скорректированный файл конфигурации обратно на устройство.
More technical Lets look at microfilters
The majority of homes in the UK have something called a master socket where the phone wiring ends and yours starts. It’s the little box on the wall that you plug your telephone/internet/microfilter into.
There are different versions of this box, and you need the one with the horizontal line running across the middle and two screws, left and right, holding it in.
By removing the screws, the bottom half of the faceplate comes off and the internal wiring is disabled. Look on the right and you’ll see a test socket.
This is a direct link to the incoming line, skipping out all of your internal wiring.
-
Plug your microfilter into this and connect your broadband modem/router. If this instantly fixes your problems, you know that the issue relates to your internal wiring or microfilters.
-
If your microfilter works when connected to the master socket, but not when the faceplate is on, simply remove the faceplate and plug your microfilter into the test socket. Then plug the faceplate’s connector into the microfilter output.
-
Finally, connect your broadband cable to the filter. It’s not pretty but it may do the trick and keep you connected until an engineer comes out.
Microfilters
Incorrectly placed or faulty microfilters cause a lot of broadband errors. If you use a splitter to connect two phones to the same socket, make sure you plug the microfilter into the wall socket first and then connect the splitter to the microfilter.
Don’t get carried away with microfilters, though. If you have two on a single phone socket or an extension cable, this may cause problems.
You can hear noise on the line
If you are having trouble connecting to your ISP and you are hearing noise on the telephone line, it’s probably a fault.
Should this be the case, your provider can check the line and identify what and where the problem is (e.g. inside your house or at your local exchange).
Still have problems with line noise?
Again, this is probably a problem with your microfilters either being faulty or not connected properly. Here is a test you can carry out:
-
Disconnect all of your ADSL equipment, including filters, leaving your telephone as the only thing connected, then see if the noise still persists.
-
You can also do a quiet line test by dialling 17070 and selecting option 2, once again. If the noise continues it is probably a line problem.
-
If it doesn’t make any sound, then connect your microfilter to the master socket, connect the phone and listen again.
-
If you hear a noise, the filter is most likely faulty so try another one.
If none of the above works and your provider has confirmed there is nothing wrong with the line, you are advised to chat to a telecoms or electrical engineer to fix the problem.
Setting Up Wireless Broadband Connection
Let’s talk about how to set up wireless broadband connection in this article. As you know nowadays you are not only able to set up wireless connection at home by using wireless access point or router, but also can subscribe wireless Internet connection service from wireless Internet service provider (WISP) to connect your laptop or several computers to Internet without the need of any phone line or other cable connection.
This is an alternative Internet connection for Cable, DSL, or dialup connection. Basically the WISP just make uses of 3G (UMTS, EDGE, HSPA, HSDPA, etc), 4G(Wimax) or other latest wireless technology to provide this kind of Internet service.
Here are common methods that you can connect to wireless Internet, let’s explore more here:
Portable USB or PCMCIA Wireless Broadband Modem
What you will be provided is a USB or PCMCIA wireless broadband modem (usually is provided by service provider) that can be plug into your laptop or computer easily, and it works as modem to connect your laptop to Internet. Please note PCMCIA modem can be used on laptop only, but USB modem can be used on both laptop and desktop. The main advantage of this modem is you can bring it together with you laptop easily and connect everywhere in broadband coverage. The main drawback is only one laptop/computer can connect to internet at any time if you only have one modem.

It’s not difficult to set up, if it’s plug-and-play (already pre-configured by service provider), you will be prompted and guided to install connection manager software and driver after plugging in the card (If not, installation CD will be provided). Once you have connection manager installed, you can use it to detect wireless broadband network and connect to Internet.
If it’s not plug-and-play, you are probably required to make some minor configuration in connection manager by providing username, password, APN (Access Point Name) and SIM PIN code (if your modem contains SIM card), all this info are provided by service provider. Sometimes you are required to configure more network settings too.
Wireless Broadband Gateway

Ok, if you have several computers (equipped with normal wireless adapter) at home that need to connect to Internet at the same time, and would like to subscribe wireless Internet service for this purpose, check with WIPS to see whether they provide wireless broadband gateway with built-in modem that can provide 802.11b/g/n Wireless routing capability. If it’s available, then you can have several computers connect to this gateway with 802.11b/g/n wireless connection and access to Internet.
In order to use it, most of the times you need to do some configuration. On Internet setting, mostly likely you are required to configure username, password, APN (Access Point Name) and SIM PIN code (if your modem contains SIM card). On LAN setting, you need to configure the SSID, channel, connection mode, encryption key and DHCP, so that other computer can join wireless network successfully. If there are RJ45 network ports on gateway, you can have network cable connection from computers to gateway too.
Don’t worry if you only have USB or PCMCIA wireless broadband modem, you can purchase Cradlepoint MBR900, Novatel Wireless MiFi 2372, Linksys WRT54G3G, Netgear 3G MBR624GU, D-Link DIR-451 or other wireless broadband routers
to share Internet connection to other computers. Make sure that the router you plan to purchase supports your wireless broadband modem.
After reading this article, hopefully you now have better understanding on how to set up this broadband connection. If still having problem, always check with technical support from service provider in order to solve the problem.
Other Articles:
Like routers, most USB modems also vulnerable to drive-by hacking
How to connect 2 Computers Directly Using Crossover Cable
Internet Speed Test How to
Настройка маршрутизатора ZyXEL Keenetic
Существует много разновидностей маршрутизаторов ZyXEL Keenetic. (Keenetic I, II, III, Lite, ULTRA и тд).
Их интерфейс хоть и отличается друг от друга, но принцип настройки везде одинаковый
Если у Вас интерфейс не такой,
как на скриншотах — делайте по аналогии.ВНИМАНИЕ! После этого действия интернет на компьютере перестанет работать (до завершения настройки). Чтобы эта
инструкция осталась
доступна, рекомендуем скачать её себе на компьютер
1. Подключение маршрутизатора к компьютеру.
1.1 Обратите внимание на порты маршрутизатора. Один из них должен отличаться от остальных либо положением,. либо цветом
Если все порты одинаковые — вам нужен порт «0» или «WAN». Это «входящий» порт. Включите в него
либо цветом. Если все порты одинаковые — вам нужен порт «0» или «WAN». Это «входящий» порт. Включите в него
кабель, который заходит к Вам в квартиру из подъезда.
В комплекте с маршрутизатором должен быть кабель, которым можно соединить маршрутизатор и компьютер. Для этого
один конец кабеля включите в любой из оставшихся портов, другой — в сетевую карту на компьютере.
1.2 Сбросьте настройки сети на компьютере по умолчанию. Для этого:
1.2.1 Найдите в правом нижнем углу иконку с восклицательным знаком в желтом треугольнике.
1.2.2 Нажмите по ней правой кнопкой мыши, затем — «Центр управления сетями и общим доступом».
1.2.3 Слева найдите и щелкните «Изменения параметров адаптера».
1.2.4 Вам нужно найти «Подключение по локальной сети». Оно также может называться «Ethernet»,
или также как модель вашей сетевой карты, зависит от настроек операционной системы. Нажмите по ней правой
кнопкой
мыши, затем — свойства.
1.2.5 Выделите «Протокол Интернета версии 4». Название также может отличаться в зависимости от
Windows,
ищите
«IPv4».
Обратите внимание, нужно щелкнуть так, чтобы выделить этот пункт, но не снять галочку. Затем нажмите «Свойства»
1.2.6 Поставьте две галочки «Получить IP-адрес автоматически» и «Получить адрес DNS-сервера
автоматически». Затем нажать «ОК», потом еще раз «ОК».

1.31.4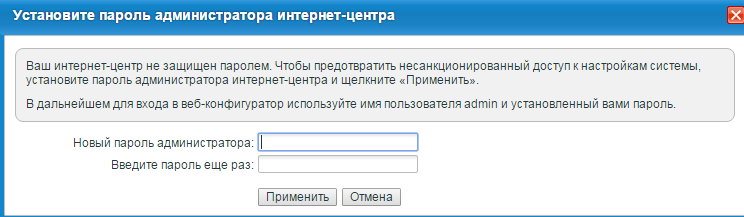
2. Настройка локальной сети.
2.1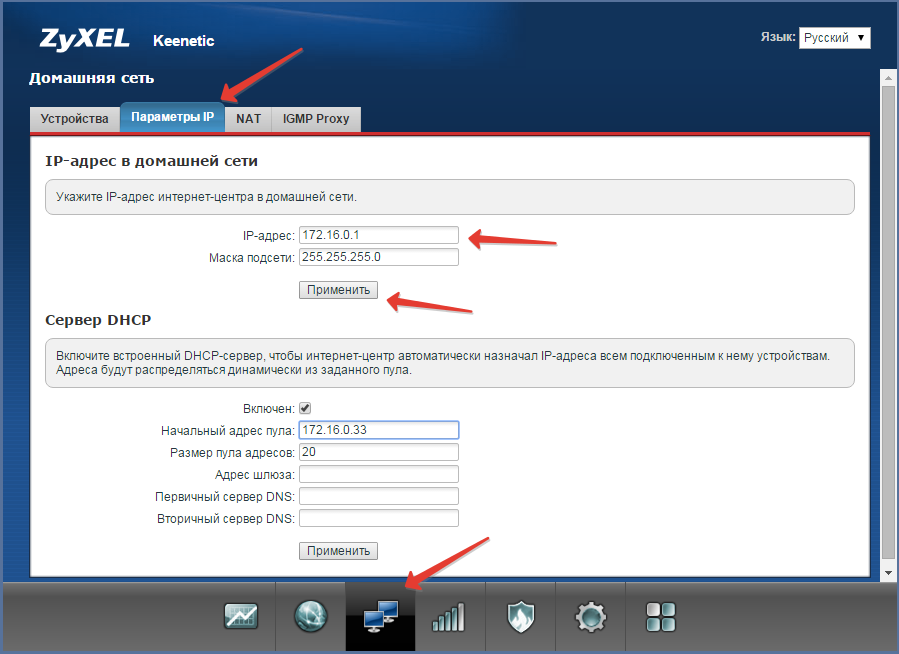
Маршрутизатор предупредит Вас о смене IP-адреса и о перезагрузке. Нажмите «ОК», чтобы маршрутизатор
перезагрузился.
Дождитесь окончания перезагрузки. Если после этого связь с маршрутизатором пропадёт, Вам нужно:
— Перезагрузить компьютер.
— Снова зайти на маршрутизатор через браузер
Обратите внимание, что адрес маршрутизатора теперь
172.16.0.1
Характеристики роутера ZyXEL Keenetic
Основные возможности
- Технология Link Duo для одновременной работы в Интернете через PPTP/L2TP/PPPoE и с ресурсами серверов районной сети
- Возможность подключения к интернет-провайдерам, предоставляющим услуги на базе VLAN (IEEE 802.1Q)
- Аппаратная поддержка IP-телевидения TVport для просмотра телепередач на ресиверах IPTV и компьютерах, в том числе по Wi-Fi
- Межсетевой экран SPI с защитой от DDoS-атак
- Беспроводной интерфейс IEEE 802.11n MIMO 2×2 300 Мбит/с*
- Многофункциональный хост-контроллер USB для модемов 3G/4G, сетевого использования USB-принтеров и USB-дисков
- Встроенный BitTorrent-клиент Transmission
Режимы работы
- Подключение к провайдеру по выделенной линии Ethernet
- Подключение к провайдеру по беспроводной сети Wi-Fi
- Подключение к провайдеру через USB-модем 3G
- Подключение к провайдеру через USB-модем 4G — Yota
- Точка беспроводного доступа Wi-Fi (IEEE 802.11 b/g/n)
Конструктивные особенности
- 5 разъемов RJ-45 (10BASE-T/100BASE-T) с автоопределением типа кабеля
- 1 разъем USB 2.0 тип A
- 2 розетки RP-SMA для подключения внешних антенн Wi-Fi
- 2 съемные всенаправленные антенны 5 дБи
- 9 индикаторов состояния
- Кнопка сброса пользовательских настроек — «RESET»
- Кнопка быстрой настройки сети Wi-Fi — «WPS»
- Выключатель беспроводной сети Wi-Fi — «WLAN»
Поддерживаемые функции и протоколы
- IPoE/PPPoE/PPTP/L2TP
- PAP/CHAP/MS-CHAP/MS-CHAP v2/802.1X
- MPPE (Auto/40/56/128)
- VLAN — IEEE 802.1Q
- Технология TVport — транзит потоков Multicast в автоматическом режиме и без затрат времени ЦПУ при назначении разъема LAN
- Link Duo — одновременный доступ в Интернет (L2TP/PPTP/PPPoE) и к локальным ресурсам сети провайдера
- DHCP (клиент/сервер)
- Работа со статическим адресом IP
- Маршрутизация протокола IP
- Трансляция IP-адресов NAT (Restricted Cone)
- Таблица маршрутов (DHCP/ручная)
- Межсетевой экран (SPI) с защитой от DoS- и DDoS-атак
- Перенаправление портов (ручное/UPnP)
- Блокировка доступа в Интернет на основании MAC-адреса, IP-адреса, URL, TCP/UDP-портов
- Агент IGMPv1/IGMPv2 (IGMP proxy, IGMP snooping)
- Транзит VPN-соединений (PPTP или L2TP)
- Клиент служб DynDNS, NO-IP и TZO
- Агент DNS (DNS Proxy)
USB-приложения
- Многофункциональный хост-контроллер USB с возможностью одновременной работы нескольких устройств через USB-концентратор
- Поддерживается свыше 25 моделей USB-модемов мобильного Интернета 3G и 4G (WiMAX)
- Сетевое использование USB-накопителей с файловыми системами FAT/FAT32/EXT2/EXT3/NTFS:
- Общий доступ в сети Microsoft Windows
- FTP-сервер с доступом из Интернета, пассивный режим, до 10 одновременных подключений
- BitTorrent-клиент Transmission
- Сетевая печать на совместимом USB-принтере (кроме принтеров GDI)
- Одновременная работа нескольких устройств через USB-концентратор
Беспроводная сеть Wi-Fi
- IEEE 802.11 b/g
- IEEE 802.11n (авто 20/40 МГц, конфигурация 2×2, до 300 Мбит/с*)
- Диапазон частот — 2,4 ГГц
- Защита сети WEP/WPA-PSK/WPA2-PSK, контроль доступа по MAC-адресам
- Быстрая настройка WPS (PBC/PIN)
- Режим Wi-Fi Multimedia (WMM)
Диагностика и управление
- Программа для быстрой настройки ZyXEL NetFriend на русском языке
- Веб-конфигуратор на русском языке
- FTP/TFTP/TELNET
- Возможность управления из внешней сети (веб-конфигуратор/TELNET)
- Резервирование и восстановление конфигурации
- Программное обновление функций
- Системный журнал
Физические параметры
- Размеры — 162 х 114 х 33 мм без учета антенн
- Масса — 280 г без адаптера питания
Условия эксплуатации
- Рабочий диапазон температур: от 0 до +40 °С
- Относительная влажность: от 20 до 95 % без конденсации
- Напряжение электропитания: переменное 100-240 В, 50/60 Гц
Internet problems troubleshooting steps
This guide will work for all internet connection problems of all types. For 3G or 4G (USB) connections, stop at the third step. If you connect with cable or a fibre-optic package, stop at the fifth step. For ADSL connections, the entire guide should help ensure you’ve accurately diagnosed the problem.
1. Make sure it’s definitely broken
2. Ping Google
A ping is a tiny bit of data that your computer sends to another computer to check that a connection works. It’s like saying ‘hello’ when you pick up the phone: If someone says hello back, you start a conversation, and if they don’t, you hang up and redial. A ping will dial four times then stop.
To ping Google from a Mac: Open Applications > Utilities > Terminal. A little box will come up. Type «ping www.google.com», then press the return or enter key.
To ping Google from Windows: Run a search for CMD. Depending upon which version of Windows you’re running, this can be done by clicking on a magnifying glass, by clicking on the search function or by hitting the Start menu and typing into the search bar. Your search will bring up a black box. In it type «ping www.google.com».
If it says «reply from» followed by some numbers (most likely ‘reply from 74.125.230.114’), then your internet is working. If it says anything like ‘request timed out’, ‘destination host unreachable’ or something else that sounds bad, then you definitely have a problem.
3. Check that it’s all plugged in and turned on
At the very least, you need the phone line going into your router and your router going to your PC. If you use a dongle, try a different USB port.
If everything is plugged in and turned on and your internet still isn’t working, try resetting your router or turning it off and on again.
If you have mobile broadband, then you won’t have a router and there’s nothing more you can do. Phone your provider and get their advice. If you have fibre or ADSL, keep reading for more troubleshooting advice.
4. Are you wireless?
If so, plug your laptop directly into the router using a cable. Can you get internet? Assuming you can, it’s your wireless settings that you need to look at. If not, it’s the router or the line.
5. What is your IP address?
Every device needs an IP address to connect to the internet. A valid home IP address should start with ‘192.something’. A non-valid IP will always start ‘169.something’.
To find your IP address on a Mac: Open System Preferences > Network. If you’re connected to the internet, your IP address should be listed under the status.
To find your IP address on Windows: Open the Command screen again, then type «ipconfig».
This will return a bunch of text and numbers, so look for an entry that says «IP address». A valid home IP address will probably start with 192.168.x.x. If it starts with 169.x.x.x, then there’s a problem with your router.
169 means the router didn’t give your computer a valid IP address, which means the two aren’t communicating properly. Contact your provider for advice.
If you have a cable connection, there’s nothing else you can try, so if none of these steps have worked, call your cable provider and ask for their help. ADSL users, continue on for our final troubleshooting advice.
6. Test the microfilter
This is the little white box that you plug into your phone socket. One side will have a phone cable, the other will have the internet cable.
Pull one out, then the other, and replace one by one to see if the cables themselves are at fault. If this doesn’t help, your network is OK and it’s probably the line.
7. Test the line
Plug a phone directly into the wall socket. If it works, the line is OK. If it doesn’t, phone your provider.
8. Phone your provider and tell them everything you’ve done
They may ask you to perform one or two more checks for them, but on the whole, that should be enough to get someone out.
That may seem long-winded, but the reason there are so many little steps is that the providers will charge you if they send someone out and it’s your fault. It’s very tempting to phone your provider whenever you have a problem and demand that an engineer visit you immediately, but this can cost you money.
If it turns out the line is OK and it’s your equipment that’s faulty, you still have to pay.